
First Broadside Conversion and Paintjob
21 June 2018I have been hopelessly behind in my hobbying. Life keeps throwing me curveballs and I keep swinging - and I’m not great at sports. In dire need of some relax time I decided to do a simple broadside build. As one of my favorite models, and the old-school railsides being the reason I started collecting, I thought it would be quick and easy to get through. I was excited for an easy win on the modeling side.
I was wrong. Oh so wrong.
Remodeling
First, I was not happy with the way the heavy rail rifle was held. By default it is held more like a big Gatling gun, low and loose as though it were being fired from the hip. The heavy rail rifle is a sniper’s weapon, in need of a high vantage point and sure grip to make precision shots at a long distance.
The conversion there was easy enough. I removed the large doohickey from the bottom with a hobby saw, flipped the rifle over, and reattached the doohickey as a stock at the back end. A little work with a hobby knife and it was approximately what I wanted to see.
Then things got tricky. The broadside comes with two arms options - missile gloves built onto bulkier shoulders, or a short and stubby right arm that is already part of the heavy rail and a massively oversized left forearm that looks like he spent far too much time home alone.
With the default arms, there is no practical way to pose the modified rifle. To add insult to injury, the right arm is actually molded to fit around the chest in a strange and fully unrealistic fashion, obviously overcoming an impractical model design with a lazy hack. As the Tau have practically no warp presence, you can’t even explain this away as “imperial mind science” - it is just terrible.
So I start trying out options. Carving arms out of the missile gloves is impractical and sounds terrible. I tried using two left arms by grabbing the one out of my second sprued broadside just to see if it would work, but the forearms were comically large, and the range of motion was still too limited.
Then I came to the other models I had around. Coldstar arms are about the right size, but I was not about to buy a bunch of coldstar kits just to… borrow… the arms, and even those were not ideal. I did have several crisis suits still on the sprue from a pair of start collecting boxes I had picked up a while back - those arms are comically sized for a broadside.
Finally an idea struck me like a hypersonic round to the frontal lobe - arms are not the only hinge joint available to battlesuits.
I grabbed the thigh armor and an arm from the crisis. The thigh armor comes with the sides of the knees attached. I cut the forearm off directly in front of the elbow joint. With a little whittling using a hobby knife, the forearms fit nicely into the thigh armor.
The upper arms of the crisis can then be cut away and attached to the bottom of the upper arms of the broadside to give you a proportional upper arm that allows you to clear the massive body of the broadside much more easily. I used the missile arms for this, but either would work depending on the look you want.
The remaining crisis elbow joints can then be trimmed on the flat sides to fit between the knees on the thigh armor. There’s a slight ledge on the inside of the thigh armor that can make this tricky, when you try to put them together you will catch it. Just slice back that ledge so your elbow fits.
Do not cut off the flat side that should still be attached to the elbow. It was formerly part of the forearm. This flat edge glues nicely to the upper arm, giving you a good strong arm all the way through.
Then simply pose and glue, and fill in any gaps (such as the big one in the thigh armor) with a bit of green stuff. Bam, broadside arms.
Redecorating
‘Round and ‘round I go, considering different color schemes. I finally decided on a black and purple, with gold and silver elements and white markings.
I started by priming in Chaos Black from the can.
For the armored pieces, I mixed three parts Imperial Black Primer from a jar (which apparently no longer exists… well… I’m going to have to figure that one out) with one part Stormhost Silver. The end effect is a black with a bit of a textured look that catches in the light - not very sparkly, but not flat. Finally shaded carefully with Nuln Oil and highlighted with some Leadbelcher. Despite my fairly sloppy application, I still like the look very much here. I will definitely be using this moving forward.
For some color, I put down a base of Kantor Blue then two thin coats of Xereus Purple. The slightest highlighting of Teclis Blue and I had a coloration I very much liked. I have not used any shade here yet, and I’m uncertain if I need it.
For gold aspects I used the standard recommended gold from Games Workshop via their paint app.
I wanted the mechanicals to look metallic, and tried a drybrush of Necron Compound I had seen from Lord Duncan. I did this directly over the black primer, then covered with Nuln Oil as it was shinier than I desired. While neat, it didn’t really give me what I wanted here. I may try a for a more solid steel look in the future - perhaps a dark gray base then Necron Compound drybrush? The flat black with necron compound does not provide enough contrast with the black and Leadbelcher armor plating. I’m open to suggestions here!
Finally, I topped off with some stark-white decor using Ceramite White in a couple of layers. I definitely need better detail brushes and far more practice for this part, but for a first run I like where it is headed.
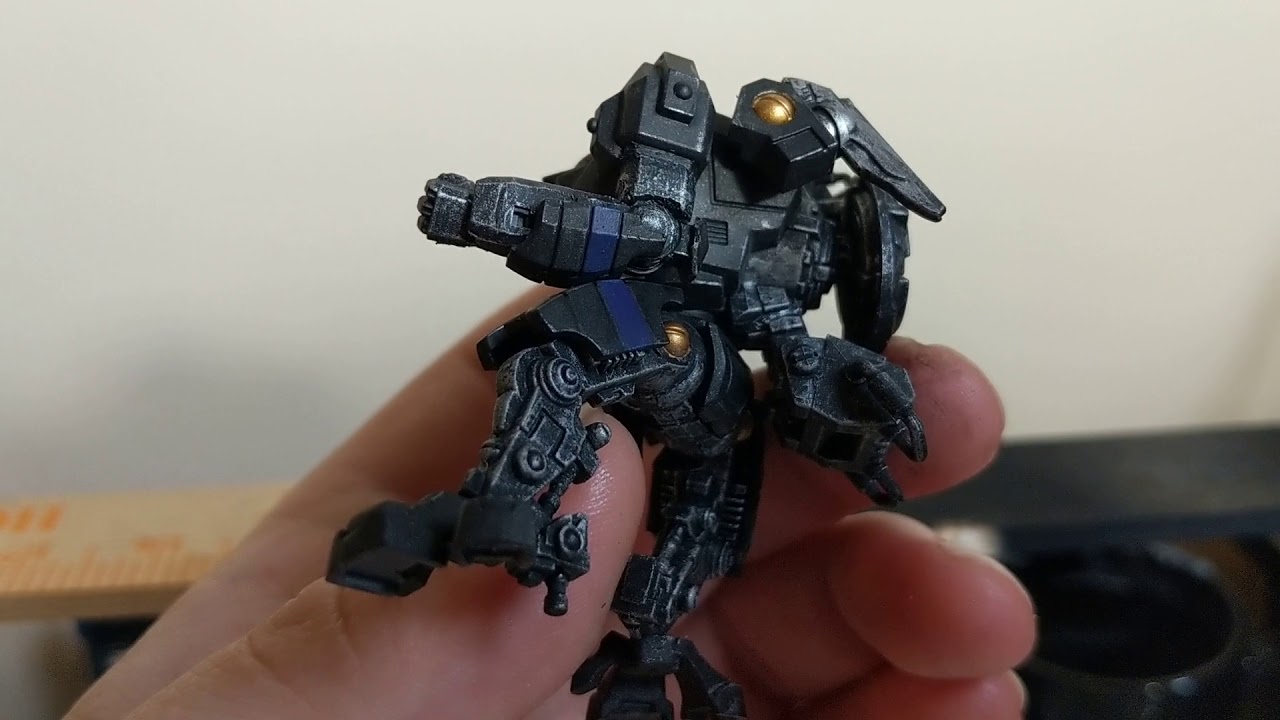
Unfinished product
So there it is, a single model about 80% painted: well on my way to an entire Ar’sho army!
The next broadside (and I think I’ll go right into building my unopened one now) will have the same arms and similar heavy rail rifle, so I will do a detailed step-by-step instruction video and post for the “broadside arms”. It will not be holding the rifle though - I am going to try for a single-shoulder turret with the plasma rifles attached to the arms for the next build.
Feedback and constructive criticism appreciated. If you’re interested in the upcoming tutorials, be sure to subscribe to our YouTube channel. Stay tuned for more craziness from the person who can’t just build a model and be good with it - me!
tags: Tutorials